For throw-back thursday I point you to one of the best posts I have ever written...
http://frosthaus.blogspot.ca/2010/05/the-great-chicken-coop-relocation.html
Give it a read, then read the next day's post too...
Thursday, 18 December 2014
Thursday, 20 November 2014
Etsy - a new adventure
SO at the encouragement of my little sister, I've been giving Etsy a go. I can't say I'm much of a marketer, and especially not an internet marketer, but at least it gives me an outlet to share the stuff I'm making in the garage. Lately its been recreating the wooden train set my Grandfather gave me when I was very small, but I have plans to make more stuff in the next few weeks that will get away from just train stuff. I've been spending gobs of time in the garage making sawdust lately - I've even assigned myself the title of 'Chief Sawdust Maker' on twitter.
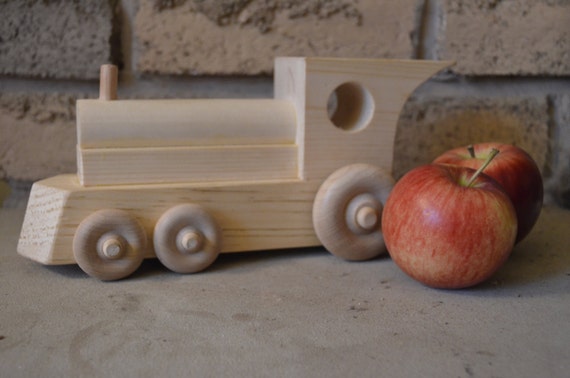
But trains are fun to make. And they are great for kids to play with. In fact, the 35 year old train that I played with as a kid has the same appeal to my guys as it did to me - which is why I started making copies of it in the first place. So far I've done engines and tenders, but I'm hoping to have some cabooses made up by the weekend. The boys each will get one of their own, and then my original can get put back up on the shelf as the pattern-maker going forward. Right now it is being well loved - and a little bit abused.
Back on topic... I'm not sure how an Etsy store gets traction. According to my sister, her online business grew more or less organically. It started with friends showing support, and then grew with inventory attracting customers and reputation leading the way. A twitter page and a facebook feed now sell her products as fast as she can make them. The Etsy storefront seems to no longer be the heart of her business - it seems like now its just another marketing tool. I'd like to get to that same place and build a business that supports itself on reputation and product rather than depending on an outside source of customers. It looks like that will take time, and I'm impatient.
My first listing on Etsy was a set of blocks, it was an eye opener:
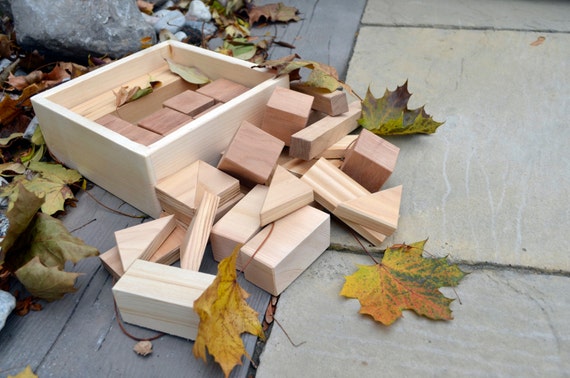
When you go from making things as a hobby to making them in a the context of a business, you start tracking time and materials and tooling. Suddenly you are acutely aware of how much it costs to make a simple thing, and how much time you have invested. It is an unfortunate reality that many online shoppers are hunting for the lowest price - the race to the bottom. And its easy to get sucked into dollar point competition where you devalue your time and materials until you are giving away your product.
I figured out that based on the value of the time and materials I put into the block set above, I had to sell it for about $55.00 to make a little under minimum wage. I can buy similar sets made in China at Toys R Us for less. Details like relieving corners and squaring the sides on the blocks are more easily done in a mass-production environment than a home workshop. It seems like that race to the bottom is a tough question to answer when it comes to right-pricing items online.
Where I am super-weak though is marketing. I am not a salesman, and I am not a deal closer. By trade I am a machinist-turned-engineer. I have never had to come up with catch-phrases or market to a broad audience. I can negotiate on a position of standards and safety, or based on what the math shows. Many of my posts here are more about 'what happened next' than 'what I want you to do next' and the few sales pitch type posts I have put up for things like Walk to School Day or donating to worthy causes have some of the lowest hitcounts of anything on this blog.
Oh - and my sister's dolls are adorable, which is maybe the very best marketing tool of all. I need to embrace cute. Being a guy who is out of touch with mainstresam, I'm not sure how to do that:

So I'm turning to people like you for ideas - how does one go about marketing an online business? How do you attract the core group that will keep coming back and then spread the word? How do you avoid the race to the bottom, and encourage someone to buy handmade/homemade/quality items?
But trains are fun to make. And they are great for kids to play with. In fact, the 35 year old train that I played with as a kid has the same appeal to my guys as it did to me - which is why I started making copies of it in the first place. So far I've done engines and tenders, but I'm hoping to have some cabooses made up by the weekend. The boys each will get one of their own, and then my original can get put back up on the shelf as the pattern-maker going forward. Right now it is being well loved - and a little bit abused.
Back on topic... I'm not sure how an Etsy store gets traction. According to my sister, her online business grew more or less organically. It started with friends showing support, and then grew with inventory attracting customers and reputation leading the way. A twitter page and a facebook feed now sell her products as fast as she can make them. The Etsy storefront seems to no longer be the heart of her business - it seems like now its just another marketing tool. I'd like to get to that same place and build a business that supports itself on reputation and product rather than depending on an outside source of customers. It looks like that will take time, and I'm impatient.
My first listing on Etsy was a set of blocks, it was an eye opener:
When you go from making things as a hobby to making them in a the context of a business, you start tracking time and materials and tooling. Suddenly you are acutely aware of how much it costs to make a simple thing, and how much time you have invested. It is an unfortunate reality that many online shoppers are hunting for the lowest price - the race to the bottom. And its easy to get sucked into dollar point competition where you devalue your time and materials until you are giving away your product.
I figured out that based on the value of the time and materials I put into the block set above, I had to sell it for about $55.00 to make a little under minimum wage. I can buy similar sets made in China at Toys R Us for less. Details like relieving corners and squaring the sides on the blocks are more easily done in a mass-production environment than a home workshop. It seems like that race to the bottom is a tough question to answer when it comes to right-pricing items online.
Where I am super-weak though is marketing. I am not a salesman, and I am not a deal closer. By trade I am a machinist-turned-engineer. I have never had to come up with catch-phrases or market to a broad audience. I can negotiate on a position of standards and safety, or based on what the math shows. Many of my posts here are more about 'what happened next' than 'what I want you to do next' and the few sales pitch type posts I have put up for things like Walk to School Day or donating to worthy causes have some of the lowest hitcounts of anything on this blog.
Oh - and my sister's dolls are adorable, which is maybe the very best marketing tool of all. I need to embrace cute. Being a guy who is out of touch with mainstresam, I'm not sure how to do that:
So I'm turning to people like you for ideas - how does one go about marketing an online business? How do you attract the core group that will keep coming back and then spread the word? How do you avoid the race to the bottom, and encourage someone to buy handmade/homemade/quality items?
Monday, 10 November 2014
Tire Storage on a Shoestring

So here's the deal, you live someplace where the roads are covered in ice for 5 months of the year, and being a safe driver, you go out and buy a set of winter tires. Then every fall you go to the local wrenchtwister and have him swap out your summer tires for winter tires and vice-versa.
He charges you $50 - $75 to change the tires and store them, and you know that there has to be a better way to store these things than paying him $100 a year for 15 minutes work, but you don't want them underfoot in the basement or garage or hall closet.

Well, fear no more. Here is a storage solution you should be able to scrape together for a pittance. Mine cost about $2.50 since I had a lot of the material on hand as scrap from other projects. Yours may run a little more, but surely not as much as the off-the-shelf tire racks at Canadian Tire (currently $100.00 - $160.00)
Materials:
- 3 Motorcycle tie-down straps (Use old cam-straps that are past their service life - they aren't holding a lot of weight, and won't see any shock loads. Avoid ratchet straps since they are less adjustable for this application - new cam-straps are $10 for a 4-pack at home depot)
- Piece of pipe or hardwood dowel 4 feet long and strong enough to take the weight of your tires. (I had an old pipe lying around that I used for this. A new 1" black steel pipe runs about $16.00 If you want to go with something cheaper, dowel is about $9.50 A fibreglass pole or a piece of lumber may also work. Look around, be creative.)
- Two pieces of 2" X 4" lumber, each of them should be about 3' long. I used scrap, so should you.
- A plywood or drywall 'scuff plate' to protect the garage wall from tire scuffs and give extra strength. A 48" X 12" scrap should be adequate.
- Two 3" X 3/8" carriage bolts with washers, and
2 Garage storage hooksor 2 screw eyes. <EDIT - The garage storage hooks are a bad idea. 3 years after install, mine stretched straight today and gave up the ghost, taking out the bandsaw as the tires came down. I replaced them with screw eyes. >
I had all of this except the storage hooks and carriage bolts on hand, so my setup ran about $2.50. But even if you have to buy everything on this list, you are still only spending about $20 - $25. Not bad at all. Even the cheapest tire rack at Home Depot runs twice that. With materials in hand, we are only about 30 minutes from a complete, loaded tire rack.
Lets start building.
The first thing to do is to get the 2X4's cut to size with matching holes. Clamp the boards together and cut them off at 28"
With the wood still clamped together, use a spade drill, to make a hole slightly over-sized to accommodate your lag bolts. The hole should be centered on the boards, and in 2" from the end. At the other end, measure in 2" and make a hole slightly over-sized to accommodate your pipe or dowel.
Measure to the center of a stud on your garage wall and attach one of the 2X4's pieces of wood using a lag bolt. 4 feet over, attach the second. They should be attached level to each other, above head height. The tires don't have to touch the ceiling, but they can if you want. the tires will likely be a little below the bar once in place, but you can lever them up above it too. It is best if you attach the 2X4's so they are on the insides of the stud bay, this will bring them closer together than the 48" long pipe or dowel.
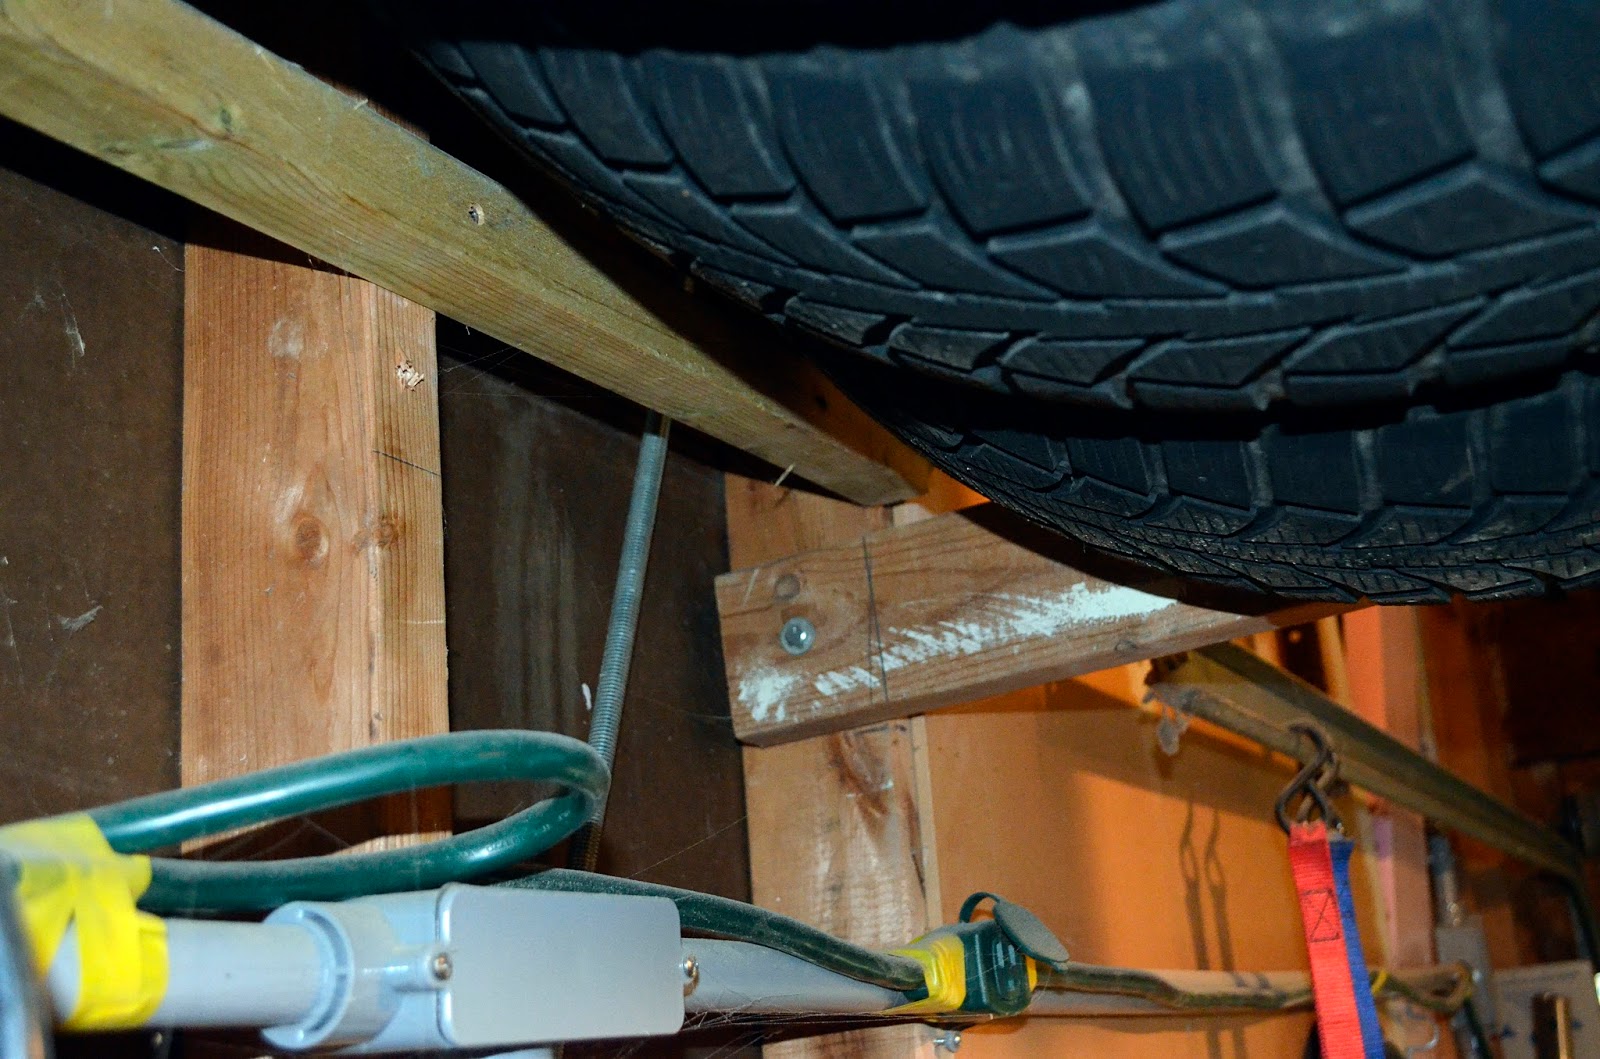
About a foot above the 2X4's you just put on the wall, attach the 'scuff plate'.

Take your pipe or dowel and feed it through the 2X4's. Use a cam-strap to pull the 2X4's together on the pipe and ensure the pipe's ends don't slip out.
Take the last 2 camstraps and attach them to the eye bolt, loop over the pipe, and then hook the other end back to the wall. One on each end.

Now by tightening and loosening the cam straps you can lower and raise the frame to lift or lower your tires when you are storing them.
And there you have it - the cheapest tire storage rack ever! Save even more cash by changing the tires yourself on a sunny afternoon. Just be sure to mark their position so you can rotate them when you put them back on in the spring!


Saturday, 25 October 2014
Cleaning up
We had puzzles and marbles all over the floor, so the boys and I had some fun cleaning up...

Sunday, 19 October 2014
Playing at Pingle's Farm Market

Every town and city has that local attractions that folks just can't wait to go and enjoy. Around here one of those is Pingle's Farm Market. The Pingle family has created a fantastic family getaway that explodes with visitors every fall just in time for the pumpkin and apple harvest, and is open as a roadside stop year round (they seem to have pick-your-own everything there all summer too). We decided to go for a visit yesterday.
The pictures below are pretty self explanatory... until you get to the very end.
 |
| They think their tractor's sexy! |
 |
| Chicken feed! |
 |
| The sheep weren't hungry for straw. |
 |
| Baaaaa Billy Goat! |
 |
| Baby Goat - cuteness |
 |
| The Jack and Jill slide! |
 |
| Sliding skills +10 |
 |
| Pedal Tractor Riding |
 |
| Jack-o-Lantern full of balloons and kids! |
 |
| Inside the Jack-o-lantern |
 |
| Diggers! |
 |
| Haybale Jumping! |
 |
| Haybale Running! |

Why is everyone sitting there? At 2:00 a crowd gathered at the end of the farmyard. Out in teh field there was cannon with 'Punkin chunkin' painted on the side of it. Suddenly the funding problems of the Canadian Armed Forces became clear...

The Farmer came out and got everyone to help do a countdown...

And then he pulled the handle and BOOM!! Flying Pumpkins!

The Pumpkins went really far. Right over his target.

After a few shots with pumpkins, he stuffed the cannon full of corn. We thought for sure it would make popcorn. He put in one pumpkin for good measure.

I wonder if we can make a pumpkin cannon for our back yard, but Mom says that would be a bad idea. We could shoot hot chocolate to the kids sledding on the hill then though.

But all that fun at Pingles had tired them (and the parents) out. We didn't get any fence building done when we got home.

Friday, 10 October 2014
The Shed has Doors!
To be honest the shed had doors a couple weeks ago, I just never got around to posting about them, and they aren't completely done - they need 1 strip of wood still, and they need a coat of stain, but they are up, and the shed is full and I no longer have garbage cans in the garage, so hey - the shed is done!
Its a skinny space back there though, so no good head-on pics of the doors. Boo!


On the inside of the doors, I made a garden tool holder. The pruning shears are forever going missing, and hopefully by giving them a spot to live, I'll be able to find them. Note they are missing in the pictures below.

The garden tote has space for tools, a spray bottle, seeds, gloves and so on. All the necessities for gardening, and since they can live in the tote, and the tote can live on the door, nothing will ever go missing again, right? Now I just have to round up all the stuff to fill the tote.

I had read on a few other blogs about printing a reverse image on wax paper and then transferring the design to wood, and thought it would be fun to try here. I got mixed results. Maybe our printer doesn't put out enough ink.
With the doors pulled all the way open, folks can still get past the shed in the skinny walkway - yay!


For the blue bins, I was going to make shelves for them to sit on, but then I decided that going with a cleat system would allow the bins to be removed more easily and offer better access to the garbage cans below.

This pic shows how the blue-bin sits on a 2X4 and has a block go over its lip to hold it in place. The shelf above is garden chemicals safely out of reach of munchkins.

And here's one last look at the closure, which is quite simple really, but works great and slides oh so smoothly. I wonder if its going to freeze up in the winter.
Its a skinny space back there though, so no good head-on pics of the doors. Boo!
The blue thing is our solar/wind powered retractable clothes dryer. Ok, its a laundry line. It also broke the first time we used it. I think I need to replace the clothes line in it.
But anyways, the shed doors are made of western red cedar with cherrywood lattice. Weaving strips of cherrywood into a cedar frame is not as easy as it sounds. The strips really didn't want to flex and bend.
I need to get another little piece of cedar to fill the gaps in the bottom half of the doors. I'm not super worried about it, but it is on my to-do list for before winter sets in too deep. Ignore the glue mess.
Also the door closure/handle thing I'm quite proud of. It turned out really well, and was a huge savings over the closures I was going to order.
The garden tote has space for tools, a spray bottle, seeds, gloves and so on. All the necessities for gardening, and since they can live in the tote, and the tote can live on the door, nothing will ever go missing again, right? Now I just have to round up all the stuff to fill the tote.
I had read on a few other blogs about printing a reverse image on wax paper and then transferring the design to wood, and thought it would be fun to try here. I got mixed results. Maybe our printer doesn't put out enough ink.
With the doors pulled all the way open, folks can still get past the shed in the skinny walkway - yay!
Inside the shed I made hanging space for 3 grownup bikes and for our gardening supplies and recycling/garbage/green bin stuff. The bikes are stored in order of most likely to be needed first. To be honest it was a bit of a trick getting them all to fit, and in the end I loosened off the headset and turned the handlebars 90° to make mine more skinny.
For the blue bins, I was going to make shelves for them to sit on, but then I decided that going with a cleat system would allow the bins to be removed more easily and offer better access to the garbage cans below.
This pic shows how the blue-bin sits on a 2X4 and has a block go over its lip to hold it in place. The shelf above is garden chemicals safely out of reach of munchkins.
And here's one last look at the closure, which is quite simple really, but works great and slides oh so smoothly. I wonder if its going to freeze up in the winter.
Wednesday, 8 October 2014
Dolla Dolla Bills, Yo.
So back a few months ago I put up a whiney post about being on strike at work and having no cash, and generally not being sure about our financial situation. Since then you may have noticed that the blog has been light (even for me, even for in the summer) on new content.
That's because we're doing something about it.

Checking out the savings as they grow has become a sort of strange fixation for me, and delivering pizzas is my new hobby. Trouble is, while we are fixating on our savings, we are still handcuffed by our debts.
A friend sent me a bookmark to check out - a blog by dude who works casually and calls himself retired at 30 based on lifestyle and spending decisions he calls "Financial Badassery" I liked that enough to take a closer look. I like the blog and the ideas are worth thinking about, even if I don't completely buy into all of them. I doubt SWMBO would ever get 100% on board with the things he suggests (save money and drink olive oil in stead of eating meat!) but some of his ideas are very valid - especially in our situation, and much of his philosophy isn't far from what we should be doing.
Anyways, our warchest has grown to almost $10,000 in 14 weeks, which is pretty sizeable. Most of that cash has gone in from delivering pizzas and cleaning offices, $3 at a time, a little here, and a little there. In that same time, our debts have been nibbling away at what money we could be putting into the warchest. Which is why we are about to change our focus and we likely won't hit our $25,000 goal in savings this year.
Its showtime, and MBNA is about to stop picking our pockets. As far as I'm concerned, killing off the debts is as good an investment right now as filling up the warchest, and once those debts are gone, well, we'll have that much more cash to dump into the bucket. Some time soon we are going to need to change our financial adviser. We have spoken with a few, but I'm not getting the right vibes yet. That will be a tricky bit for us.

With $10K set aside, we won't have to incur new debt as we kill off the old. We aren't bulletproof yet, but we do have a pretty strong shield up. If a car craps out, or we need to redo the backyard, or the roof starts leaking, that warchest will carry us along ways before we have to pull out a credit card. If we must dip into the warchest, we can turn our focus from debt killing back to topping up savings while we prepare for the next hit. In the interim, its sitting there making interest. The beauty of this is that we've set that cash aside without any major lifestyle changes. Sure I've missed TV nights, but paying to watch TV versus getting paid to drive around town doesn't seem like a tough decision.
Our big decision now is whether to have $10K celebration or wait and have a debt-free party. I think we need to add a new goal section to our 14 for 2014. Or maybe it will be our 15th for 2015.
Thursday, 2 October 2014
Hiding Wires in Fenceposts
I wish I had a more creative name for this, but well, its a quick and cheesy post about a quick and cheesy topic, so WYSIWYG.
Waaaaay back last spring I put in a series of fence posts to one day support a fence of some sort which would protect children from wandering into the pool area. Then we did a complete backyard reno, planted our espalier, built retaining walls, and redid the pool. Through all that, the cheesy fenceposts stood forlornly.
They're still pretty forlorn.

Last year we got as far as attaching some snow fence to 4X4 posts, running conduit and wiring to them, and testing the connections with some cheap plastic bulbholders. Then we left them sit for a year with the result being the pic above.
U-G-L-Y, you aint got no alibi. You're ugly...
U-G-L-Y, you aint got no alibi. You're ugly...
So I determined that this spring I would at least get those posts in order. Then I got around to it late in the summer.

First step was to hook up the electrical properly. I got some reducers and ran the conduit up the poles. two spots were getting low-level duplex recepticals, so they were easy...
On three posts though, I wanted overhead lights for the pool. I shopped endlessly for unobtrusive lights, rated for outdoors that would cast a good light, be weatherproof, and not so big that people would be hitting their heads off them. Nothing 'designer' had the look I wanted in the size I needed. Then I saw the weatherproof utility lights at Lowes, and they were about right. I snagged 3 of them.

The first step in installing the lights was to through-drill the posts. I made a pilot hole, then used a forstner bit to go through the post. With the hole in place, I ran conduit and wiring up the posts and out the other side.

Once everything was lined up and glued in, I attached the electrical boxes for the lights, and turned my attention to woodworking. My idea was to transform my cheap pressure treated 4X4 posts into lovely cedar timbers with all the wiring and conduit hidden inside them.

I started by using a hole saw to cut an opening in the end of the boards that was about the same size as the electrical boxes, then I used the router to cut flats to match the boxes' shape. A spare electrical box was handy to use as a template.

Flipping the board over, you can see dadoes I cut to hide the seams between boards. Once I installed the boards, they would lock together on the dadoes. Although I was tempted to glue everything up, I decided not to in case I ever need to get at the wiring inside. I had to use a chisel to cut flats where the tangs for the electrical boxes stuck out.

Heading outside, I put the boards up over the box for the light and screwed it to the 4X4. The two side pieces werre installed without any woodworking at all, just trimmed to length where needed. A standard 2" X 6" deckboard, 8 ft long was all I used to cover the posts, and they extended far enough to hide the conduit and electric as well. For the last board, I cut dadoes to match the front board, and routed out a recess for the junction box at the top of the post to hide in.

The final product is a nice looking cedar post with all the electric stuff hidden, and the lights up and over the pool. Now I can get rid of the halogen floodlight mounted to the back of the house and think about some sort of fence to go between the posts. I also need to build some post-caps, but I already have a plan to work from there. Stay tuned, I might get to it next summer...

Subscribe to:
Posts (Atom)