Thursday 20 November 2014

Etsy - a new adventure

SO at the encouragement of my little sister, I've been giving Etsy a go. I can't say I'm much of a marketer, and especially not an internet marketer, but at least it gives me an outlet to share the stuff I'm making in the garage. Lately its been recreating the wooden train set my Grandfather gave me when I was very small, but I have plans to make more stuff in the next few weeks that will get away from just train stuff. I've been spending gobs of time in the garage making sawdust lately - I've even assigned myself the title of 'Chief Sawdust Maker' on twitter.


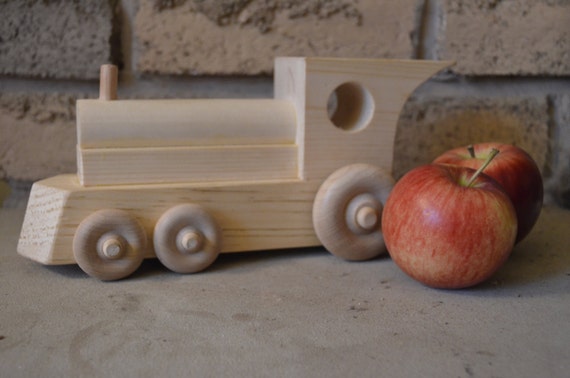
But trains are fun to make. And they are great for kids to play with. In fact, the 35 year old train that I played with as a kid has the same appeal to my guys as it did to me - which is why I started making copies of it in the first place. So far I've done engines and tenders, but I'm hoping to have some cabooses made up by the weekend. The boys each will get one of their own, and then my original can get put back up on the shelf as the pattern-maker going forward. Right now it is being well loved - and a little bit abused.

Back on topic... I'm not sure how an Etsy store gets traction. According to my sister, her online business  grew more or less organically. It started with friends showing support, and then grew with inventory attracting customers and reputation leading the way. A twitter page and a facebook feed now sell her products as fast as she can make them. The Etsy storefront seems to no longer be the heart of her business - it seems like now its just another marketing tool. I'd like to get to that same place and build a business that supports itself on reputation and product rather than depending on an outside source of customers. It looks like that will take time, and I'm impatient.

My first listing on Etsy was a set of blocks, it was an eye opener:


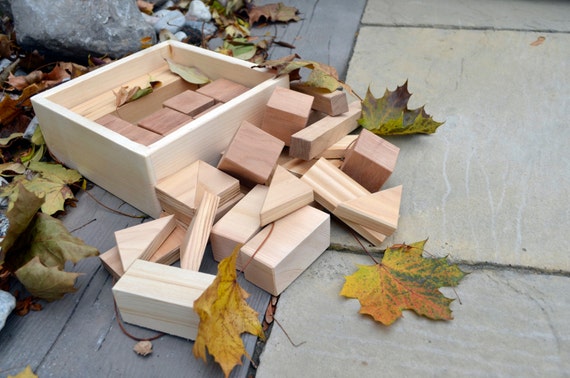
When you go from making things as a hobby to making them in a the context of a business, you start tracking time and materials and tooling. Suddenly you are acutely aware of how much it costs to make a simple thing, and how much time you have invested. It is an unfortunate reality that many online shoppers are hunting for the lowest price - the race to the bottom. And its easy to get sucked into dollar point competition where you devalue your time and materials until you are giving away your product.

I figured out that based on the value of the time and materials I put into the block set above, I had to sell it for about $55.00 to make a little under minimum wage. I can buy similar sets made in China at Toys R Us for less.  Details like relieving corners and squaring the sides on the blocks are more easily done in a mass-production environment than a home workshop. It seems like that race to the bottom is a tough question to answer when it comes to right-pricing items online.

Where I am super-weak though is marketing. I am not a salesman, and I am not a deal closer. By trade I am a machinist-turned-engineer. I have never had to come up with catch-phrases or market to a broad audience. I can negotiate on a position of standards and safety, or based on what the math shows. Many of my posts here are more about 'what happened next' than 'what I want you to do next' and the few sales pitch type posts I have put up for things like Walk to School Day or donating to worthy causes have some of the lowest hitcounts of anything on this blog.

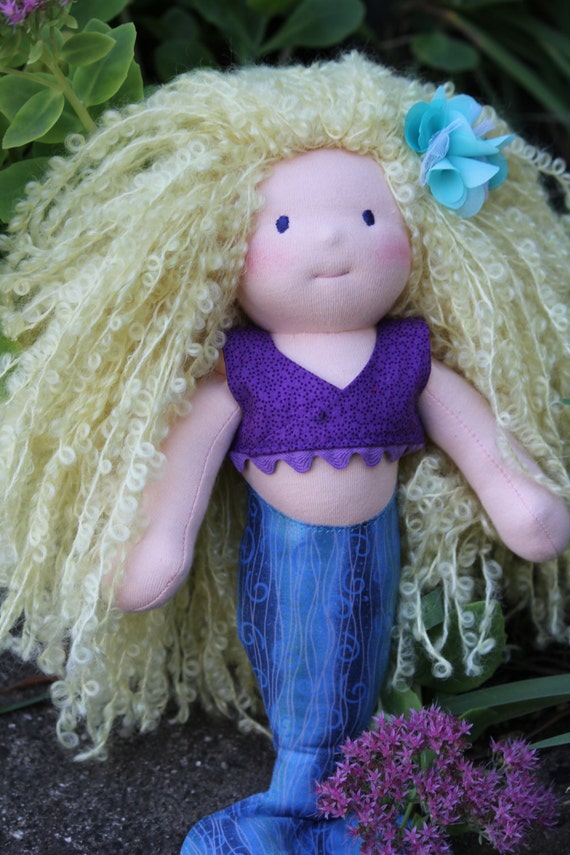
Oh - and my sister's dolls are adorable, which is maybe the very best marketing tool of all. I need to embrace cute. Being a guy who is out of touch with mainstresam, I'm not sure how to do that:


So I'm turning to people like you for ideas - how does one go about marketing an online business? How do you attract the core group that will keep coming back and then spread the word? How do you avoid the race to the bottom, and encourage someone to buy handmade/homemade/quality items?

Monday 10 November 2014

Tire Storage on a Shoestring


So here's the deal, you live someplace where the roads are covered in ice for 5 months of the year, and being a safe driver, you go out and buy a set of winter tires. Then every fall you go to the local wrenchtwister and have him swap out your summer tires for winter tires and vice-versa.

He charges you $50 - $75 to change the tires and store them, and you know that there has to be a better way to store these things than paying him $100 a year for 15 minutes work, but you don't want them underfoot in the basement or garage or hall closet.


Well, fear no more. Here is a storage solution you should be able to scrape together for a pittance. Mine cost about $2.50 since I had a lot of the material on hand as scrap from other projects. Yours may run a little more, but surely not as much as the off-the-shelf tire racks at Canadian Tire (currently $100.00 - $160.00)

Materials:

  • 3 Motorcycle tie-down straps (Use old cam-straps that are past their service life - they aren't holding a lot of weight, and won't see any shock loads. Avoid ratchet straps since they are less adjustable for this application - new cam-straps are $10 for a 4-pack at home depot)
  • Piece of pipe or hardwood dowel 4 feet long and strong enough to take the weight of your tires. (I had an old pipe lying around that I used for this. A new 1" black steel pipe runs about $16.00 If you want to go with something cheaper, dowel is about $9.50 A fibreglass pole or a piece of lumber may also work. Look around, be creative.)
  • Two pieces of 2" X 4" lumber, each of them should be about 3' long. I used scrap, so should you.
  • A plywood or drywall 'scuff plate' to protect the garage wall from tire scuffs and give extra strength. A 48" X 12" scrap should be adequate.
  • Two 3" X 3/8" carriage bolts with washers, and 2 Garage storage hooks or 2 screw eyes. <EDIT - The garage storage hooks are a bad idea. 3 years after install, mine stretched straight today and gave up the ghost, taking out the bandsaw as the tires came down. I replaced them with screw eyes. >

I had all of this except the storage hooks and carriage bolts on hand, so my setup ran about $2.50. But even if you have to buy everything on this list, you are still only spending about $20 - $25. Not bad at all. Even the cheapest tire rack at Home Depot runs twice that. With materials in hand, we are only about 30 minutes from a complete, loaded tire rack.

Lets start building.

The first thing to do is to get the 2X4's cut to size with matching holes. Clamp the boards together and cut them off at 28"

With the wood still clamped together, use a spade drill, to make a hole slightly over-sized to accommodate your lag bolts. The hole should be centered on the boards, and in 2" from the end. At the other end, measure in 2" and make a hole slightly over-sized to accommodate your pipe or dowel.

Measure to the center of a stud on your garage wall and attach one of the 2X4's pieces of wood using a lag bolt. 4 feet over, attach the second. They should be attached level to each other, above head height. The tires don't have to touch the ceiling, but they can if you want. the tires will likely be a little below the bar once in place, but you can lever them up above it too. It is best if you attach the 2X4's so they are on the insides of the stud bay, this will bring them closer together than the 48" long pipe or dowel.

Attach your eye bolts or storage hooks up at ceiling height. You should be able to tie them in to a top plate in the framing.

About a foot above the 2X4's you just put on the wall, attach the 'scuff plate'.


Take your pipe or dowel and feed it through the 2X4's. Use a cam-strap to pull the 2X4's together on the pipe and ensure the pipe's ends don't slip out.

Take the last 2 camstraps and attach them to the eye bolt, loop over the pipe, and then hook the other end back to the wall. One on each end.


Now by tightening and loosening the cam straps you can lower and raise the frame to lift or lower your tires when you are storing them.

And there you have it - the cheapest tire storage rack ever! Save even more cash by changing the tires yourself on a sunny afternoon. Just be sure to mark their position so you can rotate them when you put them back on in the spring!