
Our monthly forays are starting to sound like a conga line of camping trips in Algonquin park, but living where we do, and having such a great destination so close, and with the park being so diverse with so much to do there, well you'll just have to forgive us for returning to it over and over again, and seeing autumn leaves in Algonquin is as wonderful a display as seeing the Mona Lisa without the lines. You'll have to forgive the dozens of dozens of photos in this post. It is long and pic heavy, but two days ablaze in Algonquin is about as good as it gets.
For those who have never been, Algonquin Park is one of Ontario's largest and most accessible provincial parks. It is home to a pile of campgrounds and a handful of museums. There are art galleries and lodges, cabins and yurts, remote interior camp sites and hiking trails that go for hours or days. Since we have four distinct seasons Algonquin transforms monthly and offers activities ranging from dogsledding to sunbathing, from mountainbiking to ice fishing, and about everything between. Every season is my favourite in Algonquin, but only in the moment thereof. Its hard to imagine why anyone would visit the park in the spring when portages are filled with mud and mosquitoes are biting ferociously, but then you surge down a whitewater run while the creeks are swollen from the spring flood, ephemerals blooming along the banks, and trees flashing bright green buds and springtime suddenly becomes the very best time to visit the park. And so on for every time of year. A different adventure, a different reason to visit, but always a fantastic time.
For this trip we decided to forego the hiking trails and fall lookouts and booked interior campsites only accessible by canoe. In order to complete the trip, we needed to rent a boat - we already had paddles, life jackets and so on. So we went rental shopping and found that renting a canoe from Mountain Equipment Coop in Barrie would save us mucho bucks but add about an hour to our drive to the park. After work we drove the old Mercedes to Barrie arriving just after dark, and loaded up our boat.

Our canoe was a Fibreglass prospector. It was heavier than I had hoped, but with only 2 portages and a price of $20 for the first day, and a mere $13 per day thereafter, it was worth it. I strapped down the canoe while momma ran next door to pick up Subway for dinner, and then we hit the road headed for Algonquin. We arrived in the dark, and spent the night unaware of the fall colours exploding around us. In the morning we woke up in a wonderland.

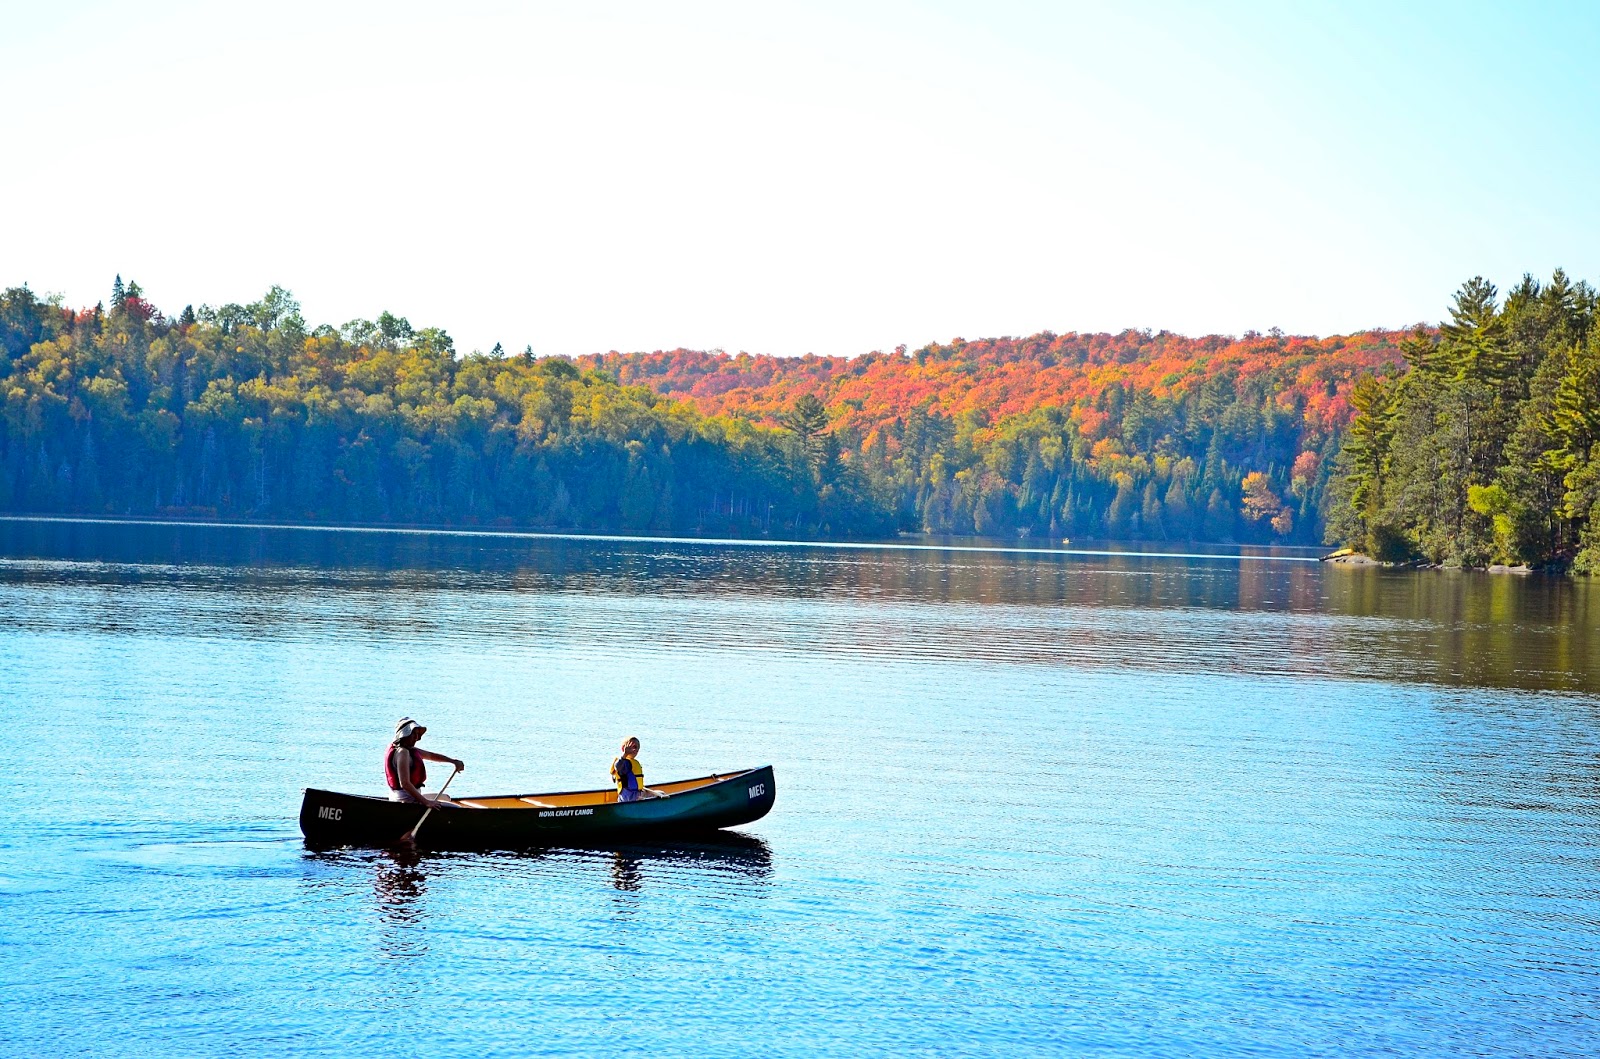
Algonquin is set on the Canadian Shield and has a forest of mostly maple and pines with some birch and other trees mixed in. Since the poor soil stresses the trees, they are famous for putting on an explosive show of fall colour. We had inadvertently scheduled this trip for the climax of colour change, and managed to sneak in at night when the crowds of 'leaf peepers' hadn't been out. The photo above (of our canoe!) was actually taken by a leaf peeper - we found the photo on Facebook after we got home! This was us launching our canoe at the start of our trip - you can't see it in the picture, but the highway through the park (Highway 60) is just behind the put-in.

We started this trip from Lake of Two Rivers, just near the beach on the east side of the lake, and headed down the river towards Pog Lake. While Momma and I paddled the boys watched for turtles and animal houses. We saw some muskrat and beaver lodges, some holes in the river bank, and a few flocks of mergansers. No bears on this trip though - we saw those earlier in the summer in this same area.
After a while we slipped across a corner of Pog Lake, and then down the creek towards Whitefish Lake. In the summer this area is busy with car campers on the banks and the creeks and rivers full of canoeists, but this time of year, we saw no one, and the only sound on the water was the babble of the two boys and they made up stories and songs. Eventually we reached the short (150m) Portage between Pog Lake (creek) and Whitefish Lake. The portage skirts a dam, and outflow was running pretty high. Everyone shouldered their backpack, and we headed off down the trail. We make a point of having something for the boys to carry - there are no free rides on a canoe trip!

Right at the start of the portage there was a nice big sitting rock, so the boys sortof posed for a picture. As you can see, Cuppa's paddle is a little less functional than most. Buddy was actually a pretty good paddler when he chose to paddle.


This portage was really easy to find since a float boom protects you from the dam on the upstream end. The portage is river right, with a nice gravel/sand landing and a few stepping stones. The trail is clear and flat with just a small climb at the beginning. The dam is unspectacular, but the sound of rushing water is nice. Earlier in the summer we picked blueberries and raspberries along the trail while on a daypaddle. This time of year all the berries were long gone.

We started to notice a problem with our canoe packing at this point. It felt like the nose of the canoe was ploughing the water rather than riding over or slicing it. I needed to adjust either the way I was paddling or the way the boat was loaded. I made the mistake of repacking the canoe after the portage the same way it had been packed in the morning, and we tired quickly as the work of pushing water in front of the boat continued through the day.

The outlet of Pog Creek into Whitefish Lake is a shallow, grassy area. When we arrived, we spooked a pair of Herons who were fishing in the shallows. Herons are usually solitary birds, so I figure they must have been grouping up for the flight south. Otherwise, I am not sure why there would have been two of them within 100m of each other. Another thing we noticed as we entered Whitefish was that the north shore of the lake was mostly pine and evergreen trees while the south shore was mixed with more hardwoods. The colour displays here were very good.


At the bottom of Whitefish Lake, we arrived at the old railway bridge where a family was fishing for bass. The boys had fun running on the bridge and the family even caught two fish while we were there. A friendly man took our picture, so we posed in the canoe for as long as the boys could stay still. They really wanted to run and play!

More granola bars were devoured, and everyone was happy.

Once we were done visiting the fish, we started paddling again, and before long we were on Rock Lake. It had been a long day of sitting for the boys, and of paddling for the parents, but the leaves and scenery on Rock Lake were fantastic. We thought about taking a portage to Penn Lake and visiting the falls and dam, but instead we found a campsite on Jean Island (campsites were filling quickly!) and got settled in.


The view from the campsite was fantastic though. No wind to speak, and a leaf show across the lake.

Our first order of business was a lunch - multigrain flatbreads with cheese and meat. It was delicious, especially after all that paddling! We quickly found out how tame the Chippies were on the site. They have figured out snacking really well!

After lunch we climbed to the top of the site and looked out over rock lake. All the hills were on fire with fall colours. The rage of reds and yellows and oranges was beautiful. We could have taken our gear up there and just sat and stared all weekend.
The way our campsite was set up, there was probably oportunity to put in a half dozen or more tents on the site. The rock wall behind us went up in terraces, with two or three really good tent sites on each terrace. For the boys, mountain climbing was a great pass time. So was getting wet in the cold lake water.

After a while, Momma and Buddy took the canoe out of a paddle while cuppa and I stayed on shore and played. I got a few pics of Momma and Buddy - I think this one looks like it belongs on a catalogue cover.
Then Buddy took me for a ride. He did really well paddling the canoe, but he tired quickly, so I took him for a trip around the island. We found a muskrat lodge and stole some firewood off it, and we found another campsite on the island. Just as we returned to camp, a breeze sprang up and we ducked into camp before it got strong.

After a dinner of shepherd's pie (I messed up and it was awful!) we tucked the boys in bed as the sunset, then Momma and I enjoyed the fire and watched the stars come out. The night sky was as amazing as the leaves had been all day. We decided to sneak our backpacks out of the tent and sleep out under the stars. The rock wall protected us from the breeze, our winter sleeping bags were very warm, and the rock radiated back heat it had trapped from the sun all day. We quickly fell asleep under a clear night sky, but in the morning, we woke up in a world of misty shadows.

As we got our camp organized the mist thinned and lifted, but for a while it gave the impression of a world made of crumpled velvet, printed on a studio backdrop.

We had a quick breakfast of scrambled eggs and bacon (protip - crack your eggs into a nalgene bottle and leave the shells at home!!) then packed up camp and paddled off into the mist. The blur of trees emerging as the fog lifted was fantastic.

Once the mist was burned off, mare's tails stretched across the sky, and the lakes were mirrorlike, with only our canoe to disturb the surface. It was like paddling through a dream.

In a few spots, a cloud of fog stretched across the lake, refusing to give in to the sun.

While we paddled in awe, the boys somehow managed to be oblivious to everything and focussed on watching for fish in the clear water below.

So our adventure went with Momma and I developing a rhythm, our paddles repeating a splatter of droplets across the water with each stroke, and the boys watching the bottom of the lakes slip past below us.


Eventually we reached the end of Rock lake, and it was time to complete the short portage into Galeairy Lake. This portage also goes around a dam, is a very easy path, and takes little effort to complete. The trail is rocky at the beginning, but joins a well worn hiking path, then leaves it again at the put-in.

The dam provided some great opportunities for photos, so we stayed long enough for a snack of trail mix and some drinks.


After the dam we started the long slog across Galeairy Lake that would bring us to our waiting car. Galeairy seems to go on forever, and we had been paddling through the leafs so long that their effect had started to wear off. We saw some cormorants along the way, and a few other things, but the hours-long crossing of the lake was, well, an hours-long lake crossing.

As we went, nature took pity on us, and a tailwind built as we neared the finish of our trip. By the time we neared the end of the lake, sizeable waves were pushing toward the car, and we almost surfed a few times. We passed the Couples Resort in Whitney and pulled up to the government launch happy to be done a great trip.

Then we loaded the canoe back onto the old Mercedes, posed for a family picture, and hit the road.

Driving back through Algonquin Park on the way home, we got to enjoy the leaves all along Highway 60. We were also shocked at the crowds of people waiting at every trail entrance and lookout point. The queue to buy park permits was close to 2 km long. Canoeing through the park, we had hardly seen a soul, and thought we had the place to ourselves. I guess we were wrong!

For the next canoe trip we do, I think we will need to plan a route with more short portages. The boys really did get bored with all the paddling (hours at a time sometimes!) and we need to bring along a couple fishing poles for the boys. I hate portaging fishing poles and gear, so I usually don't bother with them.We also need to rethink our canoe rental strategy. Renting in Barrie saved us a lot of money, but made for a long drive. There must be another alternative!


