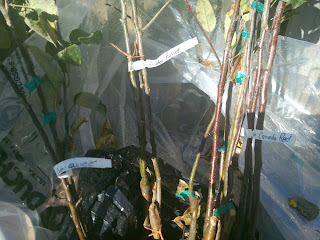
After a week of intense bambooing (new word there) I finally had a lattice running the width of the backyard and it was time to think about getting trees in the ground. The trees came to us from the nursery wrapped in plastic. This ranks up there with Christmas morning for excitement.
The package (details on the tree varieties are here)
Peeling back the plastic revealed my bundle of trees. I like anticipation. I like the look of a garden unplanted, I like spring when there is excitement a-twitter with the possibilities of the coming summer. I like a bundle of trees waiting to be planted. The nursery had wrapped the roots in black plastic to retain moisture, and put orange twine around the whole bundle to keep things together neatly.
A pair of snips too care of the twine, and I was able to separate my one bundle into three. Each labelled with the types of trees we had ordered. For the record - Canada Red, Cole's Quince, and Golden Russet.
Planting the trees was a little trickier than I had anticipated. When you plant a grafted plant like fruit trees, roses, etc. You need to be careful to keep the graft above the soil by a couple inches. The graft is usually a nub close to the ground. It is where the plant is connected to its roots - which are usually of another plant. If you bury the graft it is susceptible to disease. Plant too high, and you may get suckers from the root stock competing with your plant. This alone is not a problem.
When espaliering, you want to plant the plant so that buds align with your framework - in my case, the latticework. The plan with Espalier is that you will cut back the tree after planting such that the buds closest to the frame will be allowed to grow. For my pattern, I will be cutting back the central leader of the trees to the lowest X in the lattice. This alone is also not a problem.
The planting challenge for me was getting the graft above grade just right AND a set of buds aligned to the lattice just right. There were 2 trees where things actually aligned just right for me.
The rest of the trees posed more of a challenge. Some of the trees had 1 branch that aligned with the frame. I am not sure if that is a good thing or not. Some had none, but showed promising buds along the trunk. Some I was forced to just plant and hope for the best.
Planting all the trees went surprisingly quickly. In under 2 hours I had everything in the ground. Mother nature was even cooperative, and rained a gentle rain when I was finished. With all the trees in the ground, and watered in, all that was left to do was tying the trees to the framework, and then watch them grow. I left the trees overnight to get comfortable with how they were planted, and did the tying the next day.
The view, post-planting.
Follow along - tree tying!


No comments:
Post a Comment
Please take a minute to share your thoughts!