Our house came with the appliances included, and when we moved in, we didn't give them much thought. That was a good thing. Unfortunately the appliances also came with some issues. Not deal-breaker issues, but small things that needed fixing. The fridge (side-by-side with a under mount freezer) left a puddle on the kitchen floor overnight, which was cleared up with a $85 service call that involved dismantling the inside of the appliance to get at a clogged drain nipple.
The laundry room had a bit of a different issue. I am not clear on the how and why of it, but for some reason, the previous owners had decided that relocating the laundry vent from an exterior wall to the garage was a good idea. The end result of this was that the lint and moisture from the dryer was all over everything in the garage. Making things worse, it was impossible to line up the dryer venting on the outlet to the garage, resulting in the dryer venting to the laundry room instead of anything close to outside.
After some thought the reason for the change became clear. The dryer was a rear-vent unit. The hole in the wall was beside the dryer. Due to space constraints, the vent line for the dryer would not fit to the side wall unless you took the time to convert the dryer to a side vent unit. I assume that the previous owner either didn't know how to do that, or didn't know it was possible. Or he saw the price of a conversion kit for the dryer (I think its a Whirlpool) and had a heart attack.
These sorts of mechanical details drive me crazy, so I spent a weekend relocating the vent and converting the dryer from a rear-vent to a side vent machine. Here's the play-by play...
In the photo above, you get an idea of the "before scenario. The hole in the wall next to the screwdriver is where I need the dryer vent to end up. The hole next to the shopping bags goes out to the garage. Note the lint build-up in the corner. The plug is still in the wall here. All I have done in the pic is pulled out the dryer and removed the drywall patch over the "right hole" to make sure everything is intact in there... it isn't.
This is the back of the dryer. I have removed the access plate that lets you get a good look at what is inside. The vent pipe is held on by one screw (red Robertson) and comes out with a pull. There is a rubber gasket that seals the pipe to the inside of the dryer. It's like a big rubber band.
Appliance parts places wanted $90 for a rear vent to side vent conversion kit. That's a little pricey for me. Instead, I bought an elbow and piece of straight pipe at Home Hardware (my favourite hardware store) and then measured and cut everything to size to go from the existing dryer vent location to the side vent knockout on the side of the dryer. The tab where the red Robertson screw was holding the dryer vent in place before is now a stand-off to keep the vent from sagging to the floor of the dryer. I thought briefly about building up a block of aluminium foil to act as a second standoff past the elbow, but decided that would be redundant.
You can see in this photo that I am using tin foil tape to hold everything together. Duct tape is not only flammable, it also doesn't stick well in a high heat application. Foil tape is more expensive, but is also stronger, provides a better seal, and is safer for this. You will see everything smothered in foil tape by the time I am done here.
With the elbow in place, its time for a test-fit. You can see the rubber-band style gasket where the pipe meets the machine.
And here is the pipe exiting the dryer... so far so good! We have converted the dryer to side venting. So far our total investment is about $10. Not too bad, but things are about to get more difficult.
With the dryer set to go, its time to take a closer look at the hole in the wall. Inside the house, the previous owner had folded the vent in on itself (with a hammer) and filled the pipe with expanding foam before filling the whole thing with a clod of drywall mud. While this technique led to a minimal issue with drafts, it meant that reverting to a properly vented dryer would have to begin with removing the old pipe and replacing it with new.
Outside, there was a buildup of about 3/4 of an inch of caulk, and then the expanding foam plug. I had pulled off the vent cover earlier. Before doing anything I would need to clean up the brick face, remove the foam, and get the old vent pipe out. Using a drywall saw I cut the foam plug up like slices of pie. I had taken the first section out in the photo above. I have a really aggressive drywall saw from Stanley tools that really works well for this stuff, but it tears drywall paper rather than cutting it. Anyway, The plug came out, and the caulking peeled away from the wall with surprising ease.
Getting the pipe out was more difficult. the aluminium gripped the brick when I tried to pull it out, and creases in the pipe from previous bashing caught on the drywall if I tried to pull it in. Eventually, I got it out without damaging anything.
Looks like I'll need to do some drywall patching next time we decorate the laundry room.
With the pipe out, I set to work with an air chisel to clean off high spots on the face of the brick. This would make it easier to seat the new dryer vent without having to deal with the irregularities of the brick face. 10 minutes with the air chisel was the difference between 3/4 of an inch of caulking and a nice little bead of caulking.
It still took a lot of caulking to get everything seated. I buttered the back of the faceplate for the vent, and then filled all the masonry joints before sliding the new vent into the wall. Then I ran a bead of caulking around the outside of the vent and smoothed it out. In the end I used more than a full tube of caulk for this, which was likely overkill. I am sure much of the caulk on the back of the vent never touched masonry. In the picture above, I have leaned "heavy stuff" on the new vent to keep the caulking seated while it hardens.
With the dryer converted, and the vent in place, it was time to
build the connector pipe. Normally, I like to use round, solid dryer vent as much as possible, and try not to use the plastic accordion vent. I don't much care for the steel expanding vent either. In this case though, I needed something to fit a tight space, and I needed to be able to make it have a custom length. The distance from the side of the dryer to the wall was only about 3" and the distance from the dryer outlet to where it would connect to the exterior vent was only 6". At your local Home Hardware (or big box) you can buy what is called a "Spacesaver Expanding Vent" or a "Periscope Vent" for your dryer. Around here the periscope vent sells for about $30.
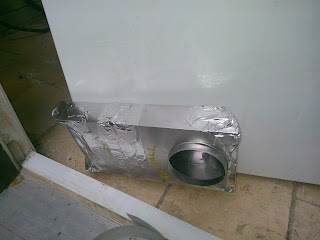
These vents are designed to be a riser from your dryer vent to a wall outlet above the dryer. They work great in basements and tight spaces. Since they are made of thin aluminium, you can cut them down if they are too small, but they will also expand to a height of about 4 feet if you need to open them up. In the photo above, I have cut down one side of the vent. In my application, the vent will be very short, and will run horizontally. I will need to cut down both sides of the vent, and reassemble them to bring the pipe forward along the side of the dryer
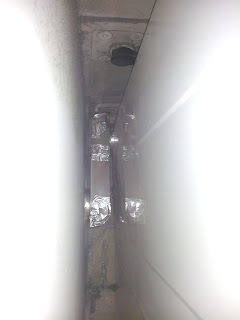
Et voila! More foil tape, and it is not a work of art, but it will vent to where I need it to, and everything works fine. Below you can see a shot of the vent in place, snugged in between the dryer and the wall in the space where the PO couldn't get the dryer to vent to.


An update... Since the install of this dryer vent, the warped door has unwarped itself, and now works fine with absolutely no attention from me. It makes you wonder what else was affected by the improperly vented dryer, and gives a feel for how important details like this can be!
ReplyDelete